Travelling with a Chromebook

My Chromebook was one of my last acquisitions before we set off, I dithered for about 3 months on whether a Chromebook would be able to handle everything I needed it for whilst I was away. Extensive googling gave me exactly what I expected, mixed reviews. Not on the performance of the machine itself but on whether it would even be useable whilst I was away.

 IMG_7130

For those not sure what denotes a Chromebook, here’s a little info. A Chromebook is usually* akin to a netbook (small portable laptop) the difference that has to be made clear though is that the operating system is not Windows as you might expect but Chrome OS. If you’re currently reading this on a chrome browser, which I sincerely hope you are, then you might now be thinking “Google?”

Chrome OS is indeed designed by Google! For most of us the difference that is most stark is that rather than installing programmes like you would on your Windows or Apple computer, you install Apps like you would on your smartphone or tablet. This is where the Chromebook becomes a write off for some people. No you can’t have Photoshop, Word or Skype, sorry! The other big difference is that the OS is intended to be used with an Internet connection, when you open an App it launches as a new Chrome browser tab. If you’re now thinking “that sounds pretty useless” as I was at this point, please give my poor Chromebook a bit more time and attention.

IMG_7129

Right, my Acer only has 16gb Solid State Drive** so for most files, photos etc. i’m using an external HDD anyway. After research I worked out that the only things i’d be able to do whilst not connected to the internet were; write/edit documents, watch movies, edit photos, listen to music, write emails and play games. As I’m sure you can see, there’s not a lot else most of us do whilst not connected to the internet than that list. I’m not going to lie and say it’s a piece of cake and it does require some adaptation to new apps such as Google Docs and Hangouts, but all of these things are possible.

IMG_7127

Here are some bits you might like. I spent £199 on my Chromebook, Lauren spent the total yearly GDP of France on her 11” MacBook Air. The biggest considerations for me were battery life, price and weight. To the touch the 2 weigh the same, around 1.2kg** The Air is thinner at the front, but overall again they’re pretty similar. I’ve got a 9 hour battery life, the Air has 11 and finally my Chromebook cost £900 less than Lauren’s Air.

IMG_4897

I’m not trying to say that my Chromebook is superior to the MacBook Air, as Lauren has a huge SSD and is happily photoshopping as I write, but I’ve got a desktop at home to do all that. What I needed for the duration of our trip was exactly what I’ve got, a cheap, light computer with a great battery life!


Everything in the review before this sentence was written after 3 months of travelling. Here is the 14 month update as to how its held up!

I am still typing on my Chromebook, so as you can see it’s still going. The case has a few more scratches in it but the performance is still going strong. When I consider the body is plastic it’s actually done remarkably well. Whilst living in the rainforest for 8 months I did have some problems that meant the keyboard wouldn’t work. Annoying but not an issue most people will experience (it survived 6 months of humidity before this problem occurred.) On leaving the jungle some silica gel fixed the problem in under 12 hours.

Overall I would say that whilst the screen isn’t the best, it’s comfortable and the speakers whilst of lower quality have a superior maximum volume to Lauren’s Air. The built in webcam is terrible but since most of the South American internet connections are as well, a lower quality camera hasn’t been a problem.

Most importantly the OS. Have I found it a problem? Easy answer, no. There are still issues to be worked out, such as the fact that I can’t store music to device from my Google Music account, but hopefully this is just in the pipework for the imminent updates. You can still store music files and play them normally without a problem.


So yes i would suggest a Chromebook as a viable and good choice for a computer whilst travelling. I can only speak for my Acer C720 in terms of build and performance but I can say that Chromebooks are viable options for travelling.

*The Chromebook Pixel is much more heavy duty.
**With 100gb of free Google Drive cloud storage for 2 years.
***The Air weighs 1.08kg but we’re travelling so it’s aluminium needed a protector bringing the weight up

Money in South America

One of the questions we’ve found a lot of people asking before they go on a trip is “what’s the best way to take money abroad?” For a trip in South America ATMs are plentiful, except for a few, more remote places, so we’d advise using a debit card. Hopefully in this blog we can provide some useful advice as to why, based on our experiences. 

Worried about taking a card abroad

A prepaid cash card is an alternative that some travellers use to access their money abroad. Whilst they can be a useful backup we’d advise against them as your main access to money for a few reasons.

  • There are often quite a few fees involved in using a prepaid card abroad. Yes debit cards have them to, but they can be the same or lower than prepaid cards.
  • They can’t always be used for all types of transaction.
  • They have to be reloaded with money when you run out, which may not be as straight forward or cheap as it seems at first. Some cards can take up to five days to move the money around and charge you a percentage fee.
  • They come loaded either with your home currency, US Dollars or another currency that your provider offers. This means that you can suffer from bad exchange rates, especially if you’re travelling through multiple countries.

 IMG_7114

Before you leave

There are several important things you should do before you leave your home country.

  • Work out which debit card has the lowest fees abroad
  • Get some US Dollars (USD)
  • Get some of the local currency of the first country you’ll be visiting. Or even each one you plan on visiting.
  • Tell your bank you’re going abroad and let them know which countries.
  • Make sure you have a reserve way of accessing money, another debit, credit or prepaid cash card.


Where to get the foreign currencies

Use the internet to look up the best foreign currency exchange office in your local area. If Google can’t help you out, ask some friends or go on a message board. We’ve found it’s often easier to get some foreign currency before you head abroad. It’ll also give you peace of mind that you’re not at some dodgy street vendor’s mercy. For people heading through London we’d definitely recommend Thomas Exchange Global on the Strand. You can order the money online through their website and it’ll be there when you turn up. They offer excellent exchange rates on commonly used currencies and pretty good rates on the more obscure ones.


Debit Cards

If you’re going to take a debit card (we suggest you do) then head on over to London and set up an account with Metrobank. When we first opened our accounts with them they offered free withdrawals abroad. They do now charge £1 per ATM withdrawal or transaction (outside of Europe). This is still far lower than any of the other UK banks, and there aren’t any confusing percentage fees that keep adding up either. For example Lloyds charge an additional 1.5-2.99% non-sterling transaction fee on top of a flat fee, so on one of my transactions i was charged a total of £7.89 on a £150 transaction. Nearly £8 versus £1 is a no brainer really… Of course if you’re not based in the UK, Google the best cards for travel in your country.

 IMG_7117

Why USD

You should always have some USD on you. As the worlds base trading currency its easy to exchange pretty much anywhere in the world with good rates. After the USD then the Euro is probably the second best to have on you. Not only is the USD easy to exchange but in lots of countries, especially in tourist hotspots you can usually pay for a lot of things just with it without having to exchange to the local currency first. If you run out then many countries, especially in South America allow you to withdraw USD straight from ATM’s. As a rule your USD will be more useful in poorer countries or those experiencing economic instability.


ATM’s abroad

Withdrawing cash from ATM’s abroad isn’t of course as straight forward as in your home country and they react differently to different cards, so offering advice on which banks to use in various countries may not of course be helpful. The best thing to do is ask other travellers and use various machines until you work out which one is the best for your cards. Things to take into account are whether the ATM is going to add an additional fee on top of the one you’re already paying your bank and the maximum it’ll let you withdraw. There’s no point in saving a small amount of money on one withdrawal if you have to make three withdrawals instead of one from a different bank.


Let your bank know.

We’ve found a lot of people actually argued against this as they informed their bank they were heading abroad, only to find their cards blocked anyway. This is of course a worst case scenario which is why you should always have some local currency on you. With Metro Bank we have never experienced any problems with using it in over 20 countries. When you ring them up let them know your dates of travel (you can leave it open ended) and which countries you’re likely to be visiting. Lloyds did stop one of my transactions but sent me a text which would allow me to use the card unrestricted in that country if i replied by text. Annoying but i can’t complain too much for them being cautious and it only delayed me by 5 minutes.


Using your debit/credit card for payments.

We’ve only paid with card a couple of times as often there are hefty percentage costs for paying with your card abroad. It’s also worth remembering that some places only accept Visa or Mastercard, not both. If you set up a MetroBank account you’ll receive a Mastercard Debit card. Occasionally this can cause a headache as most people are only used to seeing a Mastercard Credit card and will try and charge you a higher credit card transaction rate. Just let them know it’s debit.

 IMG_7121

What if my card gets cloned or stolen.

This a worry to everyone, and worse when you consider you could be thousands of miles from home. As long as you’re always safety conscious and keep your main card and your backup separate then the worst this should be is a headache without stranding you abroad. Card cloning is probably a bigger problem is your home country than in South America. In the UK we’re used to ATM’s dotted outside all along the high street.  In South America you’re more likely to find them inside a bank with a couple of security guards in constant attendance. This makes it much more difficult for crooks to set up a system to copy your card.

Some country advice

IMG_7120

Peru

We’ve found that Peruvian ATM’s don’t seem to charge for withdrawals as a rule. The maximum we can withdraw at one time in 700 PEN, equivalent to £150 GBP. ATM’s are usually found inside banks, if the bank is closed there will be a door accessed by scanning your card through a reader. If you’re worried about doing this, just wait for someone else to open the door on the way out. USD are easily exchanged, can be withdrawn from ATM’s and can be used to pay for tours and transportation such as planes and intercity busses.

Chile

Chilean ATM’s did charge us for withdrawals as a rule, but did allow us to take out fairly large amounts in one go. The USD isn’t as accepted as readily as elsewhere in South America due to the strength of Chile’s economy. In especially touristy spots such as San Pedro de Atacama or Torres del Paine national park USD can be used to pay for most tours and activities, just ask.

Bolivia

Some Bolivian ATM’s charged us but not all, other nationalities had different experiences. Your money will go a long way in Bolivia so you won’t be making lots of withdrawals. If you have a lot of USD then chances are you’ll never have to go near an ATM anyway, just exchange it for Bolivianos. Some places actually prefer you to pay in USD but be aware that the exchange rates can be pretty bad.

Argentina

At the time of writing Argentina has been experiencing a period of economic unrest. As such they have introduced numerous sanctions to try and stabilise their economy. These are aimed at their own citizens but affect  tourists just as much. If you’re really interested there are lots of economics articles that will explain it much better than i can. The point is you can’t withdraw much in one go from ATM’s and it’ll probably cost you a fair bit. Don’t be worried though as there is a black market for USD as Argentineans try and ride out the crisis. The Blue Dollar rate will save you 30% or more on your trip to Argentina. Take as many USD as you are comfortable taking and exchange them for the much better Blue Dollar rate on the street. If you run out of USD, pop into Chile or Uruguay to withdraw more. Be aware that the Blue Dollar trade is illegal but exists in a grey zone. As long as the police don’t physically see you exchanging the money they don’t care. They want dollars over pesos as much as anyone else.

Uruguay

We didn’t spend much time in Uruguay, only visiting Colonia. However the shops and cafes there allowed us to pay in USD, Euro, Argentine pesos as well as the local currency. We only tried one ATM and it did charge us quite a bit, but this may not be the rule.

Paraguay

Again we only visited Paraguay briefly. From what we understand the USD is easily accepted. We weren’t charged for our ATM withdrawal and we could withdraw USD. As with Bolivia your money will go a long way. We withdrew £40 for our day in Paraguay, we still had over £30 at the end of the day.

Brazil

Brazil gave us the most hassle when it came to withdrawals. Some ATM’s won’t allow you to withdraw cash. I don’t mean some banks i mean some specific machines. The best thing to do is to try every machine in each bank you visit, when you find one that works remember which one it was. Santander didn’t charge us for withdrawals. The USD is best exchanged into the local currency in cities but tours in more touristy areas can be paid for with it.

Colombia

You can usually withdraw between 300,000 and 600,000 COP in one go from an ATM (£75-£150) BancoColombia ATM’s were really easy to use and didn’t charge us any additional fees. They also allowed us to withdraw the upper amount of 600,000 COP. The ATM’s are nearly always inside a bank or a lobby for use after hours. These lobbies always have excellent air conditioning, great for cooling off when you’re out and about!

Jungle Diaries: 1

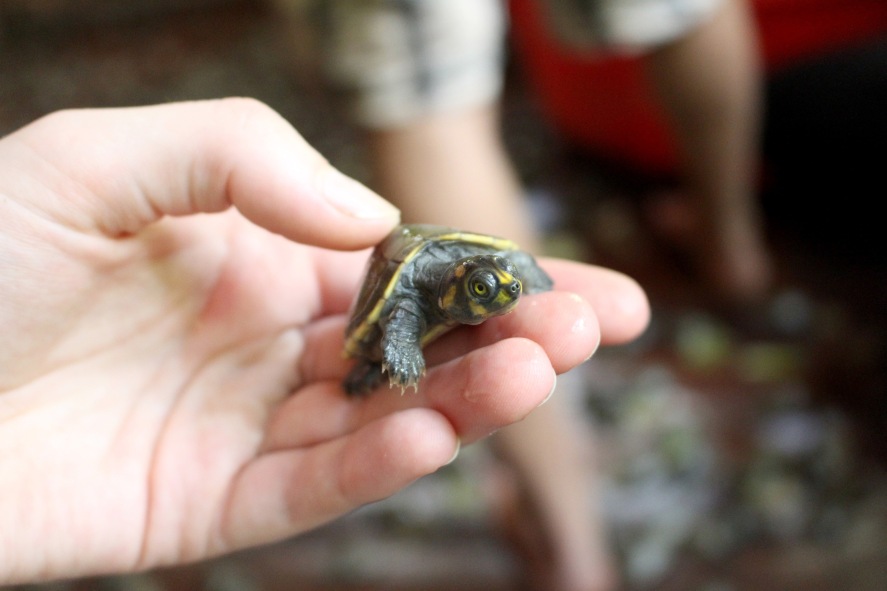
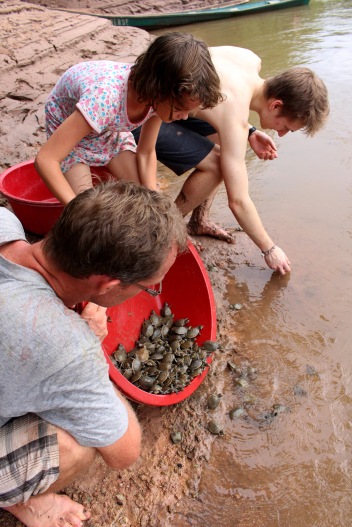
Day of the turtles The evening that the final piece of rescue centre paperwork arrived, I joked to Douwe and Olivia that tomorrow the animals would start arriving. In my defence I think I joked it would be jaguars. Early the next day a rumour was circulating in the nearby village that the ministry was on its way with 20 turtles. 20 was nothing to worry about. But as the day went on the number had risen to 200, a bit more of an issue. Douwe went across to the village to try and contact the ministry, but they’d already left to come to us. With nothing else to be done we waited. I will admit at this point I joked that knowing Peruvians it would be 2000 turtles. I was wrong. When the ministry arrived they had 2 enormous buckets almost overflowing with confiscated baby turtles. IMG_3280 Carrying the buckets as quickly as possible to the house, the decision was made to empty the turtles onto the floor of the volunteer house. A landslide of live, dead and semi-live/dead turtles covered the floor and we worked to spread them out before too many suffocated. IMG_3313 Of course some were very alive and instantly went running before we could barricade the other rooms. (The last of these was recovered from behind the toilet the next morning and was reunited with his buddies!) IMG_3359 With the ministry workers helping we set about getting the live ones ready for immediate release back into the river. The first thing we did was grab the turtles that were still trying to run around and organise them into groups of 10. These were placed into the large buckets 200 at a time. With the first lot ready to go we headed down to the river to do the single biggest release of Esperanza Verde yet. We sent around 1000 of these baby turtles back into the wild on the first go. IMG_3456 IMG_3492 The ministry had brought some press and cameras with them so videos of Lauren and I looking like we knew what we were doing were played on Peruvian TV for the next week. Lauren even gave an interview, but we’re not sure if it made the cut. IMG_3410 Back at the house the process was repeated several times until all of the turtles that seemed fine were released. The other volunteers had finished the afternoon feed at this point and came to help. Of course the stress and the transportation meant that in total around 10% of the turtles were dead on arrival. In the hopes that some still had some life in them we lined them up to make it easier to see if one moved. IMG_3445 The turtles had been poached as they were hatching along the banks of a river. Judging by the number of turtles it was a large number of nests. The culprit had been trying to sell them from their house and a group of children from a nearby school telephoned the authorities to report them. This seems a good sign for the future of nature conservation in the area. IMG_3477 Some of the last turtles stayed with us for several weeks until they recovered sufficiently to be released. And before we knew it the last of the 3,300 were back in the river where they belong. It goes without saying that I’m no longer allowed to make jokes about animals arriving. Thousands of turtles were a challenge…but Jaguars…

Date With an Uakari

Iquitos is a great place to get on a boat and head off on an Amazon adventure. As Lauren and I had just had an eight month jungle adventure we didn’t really want to spend the money on another. One thing we were interested in however was the Wildlife Orphanage and Butterfly Farm of Pilpintuwasi, just outside of Iquitos.

IMG_6681

Getting to Pilpintuwasi was fun and interesting on it’s own. Firstly you have to head to the port of Bella Vista. This small village at the edge of Pucallpa is a market, floating village, fishing port and river boat terminal.

IMG_6741

The bustling port could be quite daunting if you’re not well travelled, but it’s really interesting if you stop and look.

 IMG_6743

We’ve got to admit we were a bit lost as the floating walkways head off in different directions, all to different docks. Of course there are no signs to indicate where to go, and after some advice, that was mostly people vaguely pointing in varying directions, we happened to end up in the right place.

 IMG_6746

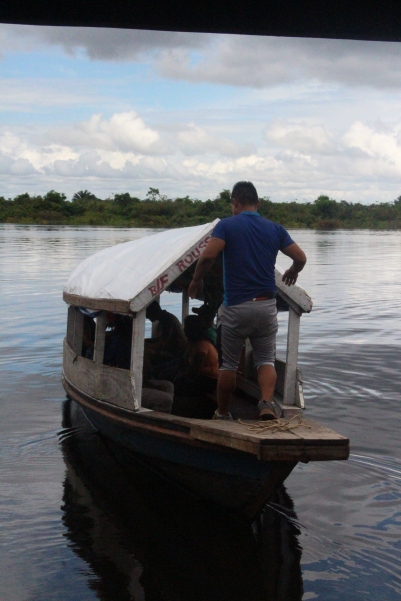
We’d read up online that there were two types of boat, expensive private slow boats or water collectivos. We were looking for one of the collectivos. A boat driver told us he was going to Padre Cocha, the correct destination. We asked the price, got the correct answer and hopped in. 

Being alone on the boat we were a bit confused when he immediately set sail. It turns out the collectivos just set off when they have some passengers. So we got a 20 minute private boat ride along the river to Padre Cocha.

IMG_6710 

From the port it was a nice walk through the village, first heading towards a water tower and then to the end of the road. Here there was a big sign for Pilpintuwasi.

Pilpintuwasi was originally set up by an Austrian as a butterfly farm, but when the owner woke up one morning to find a jaguar cub on her doorstep it also became an animal rescue center. Much like Esperanza Verde locals bring in animals that they rescue and the government drops others off after confiscation.

Today the center has a huge collection of animals, jaguar, ocelot, Capuchin monkeys, marmosets, Macaws, capybara etc.

 IMG_6590

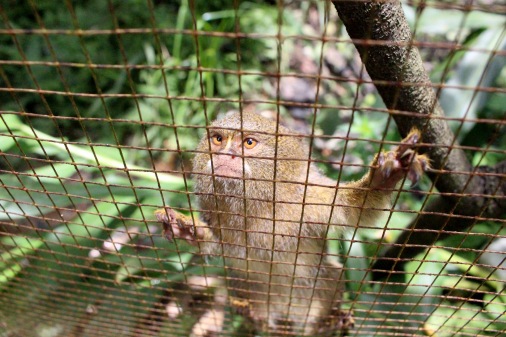
The stars of the show and the main reason we went are the Red Faced Uakari.

 IMG_6523

These monkeys are incredibly endangered and are almost impossible to breed in captivity. Pilpintuwasi has a group of them living in release around the center.

So when we first arrived at Pilpintuwasi, before we’d even made it inside, we were greeted by this face. As this monkey was the last animal on my South America “to see” list, I was very happy.

IMG_6517 

The monkeys run amok around the center, and much like our much missed Willow the Wooly Monkey, their male adolescent enjoyed terrorising the volunteers. He especially liked it when the male volunteers were carrying sandbags, jumping up and down on their backs.

The butterfly farm that was the original inspiration for the project still sits at the center. The guided tours give a great understanding of the lifecycle of these animals.

 IMG_6543

We were shown lots of different species in the butterfly house, as well as getting to see some of the workers collecting the eggs.

 IMG_6546

There was a brief surprise when we also found a Kinkajou curled up under some stairs. It had apparently escaped the day before and obviously found somewhere nice to sleep.

Next we were shown the room where the eggs are stored, caterpillars hatched, and crysalis formed. Eventually leading to the new butterflies.

 IMG_6555

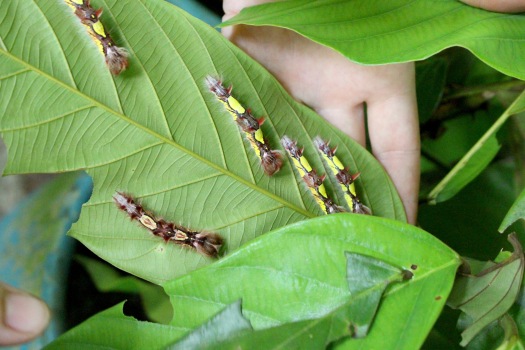
Some of the Caterpillars were huge and it was amazing to see how the chrysalis perfectly resembled the leaves of their favoured plants.

 IMG_6550

Whilst we went mainly for the Uakari, the butterfly house really was amazing and equally worth a visit. If you find yourself with some free time in Iquitos, we’d definitely recommend Pilpintuwasi as a day trip to get away from the bustle of the city.

Visiting the Manatees in Iquitos

After eight months at Esperanza Verde it was finally time to hit the road again. Arriving once again in Pucallpa, the nearest city, we filled our boots with pizza and cold drinks. It’s amazing how much you appreciate a fridge after jungle life. Pucallpa doesn’t suffer from an excess of sights, so after visiting our favourite pizza place on the main plaza we’d just about exhausted the attractions. I exaggerate slightly. The two options you have available are visiting the Parque Natural, the local zoo, or going to swim with the river dolphins. As we’d just spent months living with the local wildlife and we’d swum with the dolphins in Bolivia we’d be giving them a miss.

Pink River Dolphin

Our first stop on our restarted voyage would be Iquitos. Famous for being the largest city in the world that is inaccessible by road. It’s remote Amazon location means that you can either fly or catch a boat. The boat from Pucallpa to Iquitos can take around five days all going well. With flights taking under an hour and at low prices, we once again opted to fly.

 wpid-wp-1429230186278.jpeg

Most people visit Iquitos for one of two reasons, to go on jungle tours or to take Ayahuasca, the increasingly popular jungle drug. After seeing the Gringos in various states of disarray wandering around Iquitos we weren’t keen on staying that long. The jungle tours from Iquitos are meant to be amazing but for obvious reasons we wouldn’t be paying for one.

With a few days to kick back and enjoy the river front we wanted to see what the other sights there were. 

The Pilpintuwasi animal orphanage and the manatee rescue centre are both located just outside of Iquitos and make great and interesting days out.

 IMG_6535

The Manatee rescue centre is doing a great job of rescuing and re introducing the endangered Amazonian Manatees (Trichechus inunguis). They, like many other Peruvian rescue centres receive other animals that they weren’t expecting from the government. When we visited they had a Squirrel monkey, a Monk Saki and a White fronted Capuchin. They also had a very playful Otter.

The centre does an excellent job teaching children about conservation and recycling. The talks are given by a man hidden inside this moving tree. We were offered the chance of posing with him and of course jumped at the chance.

IMG_6762 

The Amazonian Manatees chomp their way through several kilos of aquatic plants every day, and after a thorough disinfect you can feed the juveniles.

IMG_6888 

The manatees swim over to you when they detect the water movement caused by your hands.

Graceful as you’d expect from a cow with flippers, they decelerate by simply bumping nose first into the wall.

 IMG_6886

Their mouths are amazing, with the teeth located well towards the back their lips are divided multiple times and our highly dexterous, allowing them to grab and pull food deep into their mouths.

 IMG_6861

Some of them are particularly fond of belly rubs. 

The special milk that the young manatees require is very expensive and not commonly available in Peru. All of it is donated by the Dallas World Aquarium (DWAzoo), allowing these manatees to grow to adulthood.

 IMG_6842

The last surprise at the center were the Paiche. Anyone visiting Iquitos will see Paiche all over the menus. Whilst we knew it was a fish, a tasty one at that, we hadn’t a clue what it looked like. The two meter juveniles that the center were growing were quite a shock to us.

IMG_6833

Capable of growing to nearly 5 meters in length the Paiche are one of the largest freshwater fish in the world. A member of the bony tongue family they can open their mouths to allow their young to hide inside. This has meant that overfishing has seen a vast reduction in their numbers as catching an adult in the wrong months also kills hundreds of fish sheltering in their mouth.

As we were leaving our guide pointed out the wild Pygmy Marmosets (the worlds smallest monkey) and Saddleback Tamarins jumping around in the nearby trees. If you’re heading through Iquitos, take a few hours to head out of town to visit the Manatees and help support this important project.


Braving the thieving Monkeys

After a monkey stole Mr Ducky in Cambodia and a Hawk tried to eat him in Argentina, the couple were naturally quite scared about meeting the resident animals at Esperanza Verde.

A close shave for Mr Ducky....
A close shave for Mr Ducky….

IMG_8094

With our resident monkeys famed for stealing anything that isn’t tied down, extra caution was required…we didn’t make the same mistake a third time…

Finding a Volunteer Project in South America

Volunteering is something Iain and I spent hours painstakingly researching when we were preparing for our trip to South America. The obvious questions for us were: what type of volunteer project should we choose, where should we volunteer, and how should we begin organising our volunteer trip? It was a daunting task deciding where, not only, to donate our time, but also our money from the thousands of projects out there on offer.

How to choose a type of volunteer project?

For us working at an animal rescue centre, an orphanage/school, a construction project, or teaching English were all considerations. And really we made the final decision by being brutally honest with ourselves. What would we enjoy most and what type of project would we get the most out of? To all the selfless do-gooders out there, this might all sound a bit me me me, but really you need to be enthusiastic about a project to do any good.

The reality for me was: I wasn’t sure I was physically fit enough or skilled enough to be part of a construction project 24/7. Also having never worked with children before I couldn’t promise myself that after a week or so a group of them wouldn’t drive me crazy. I love kids but usually kids that I can look after for a few hours and then give back to their parents. An after our episode with Tannat the stray dog we picked up in Argentina, I’m sure you can appreciate why working with animals became the focus of our efforts. Choose something you love and you and the project will both be happy with your work there.

Tannat
Tannat

How to begin organising your volunteer trip? Cutting out the middleman.

When beginning our search online it was easy to be lured in by the glossy websites or middlemen offering “life changing experiences” all over the world. You’ll know ones if you’ve begun by typing “volunteer abroad” into Google. Tempting as the pictures of volunteers holding turtles or the close-up shots of jaguars seemed at first, with prices way over £1000 for 2 weeks these projects were an unrealistic option for us. Despite these companies promising pre-departure support and local orientation on arrival we like many had to question what justified these prices. From a little research and speaking with projects that had once been involved with these companies, usually only a small portion of what the volunteer pays actually goes to the project itself.

True or not, why would you pay £1000 when you can pay a tenth of that for virtually the same experience? We chose a project were we paid a little under £100 for 2 weeks directly into the hands of the project. For that our food and accommodation were included as well as a donation for materials for the project. And to top it off we didn’t have the nagging question in our minds as to what our money was actually paying for. The organisation was upfront about all the costs involved with the project and we could see exactly where our money went.

IMG_6289
Working with the materials, our money helped buy.

How to find the free/cheap volunteer projects?

Having ruled out going through ones of the large companies, we had to search a little harder to find and contact the projects themselves. Unfortunately it’s not as easy as adding “free” or “cheap” to your original query in the search engines. The commercial middle-mans still appear…£1000 is cheap in some peoples definitions apparently?! We luckily stumbled across this website which proved invaluable for our search in South America.
http://www.volunteersouthamerica.net/

Anything but glossy, this basic website offers a list of “grassroots” volunteer projects throughout South and Central America. Simply web-links but it allows you to contact the projects directly yourself.

Not travelling to South America? Don’t worry these websites/lists do exist for your chosen destination; you just have to be a bit more creative with your search. I suggest searching for “lists of free volunteer projects in …” or “volunteering aboard for free blogs”. For most travelling and backpacking, blogs and first hand advice are a vital source of information. Likewise when you’ve narrowed down your choice of project it is worth searching for a few blogs written by people who have actually volunteered there. They might simply have useful advice about getting there or what to pack but they may also help you avoid less authentic, money grabbing organisations.

Which volunteer project should I choose?

As I said before reading blogs on the projects can be really helpful, but here are a few of other tips for choosing the right project.

Read the websites – sounds simple but get as much information out of the website as possible. Read all the information available but don’t be afraid to contact and ask for further info if you cant find what you need. Reading newsletters and updates from the projects can be very reassuring.

Contact multiply projects – I’m not saying email them all, keep to those within your chosen field, but it’s a good idea to contact a few as they may not all have availability for your chosen timeframe. Also a friendly, enthusiastic email response from a real person goes along way to cementing your decision to volunteer. We emailed multiple projects but it was Olivia’s quick, personable response that ensured we were on the next plane to Esperanza Verde.

Talk to other travellers – if like us you were already on the road when you were finalising your decision of where to volunteer, other backpackers can be an excellent source of information. They might for example know of smaller/start-up projects that perhaps don’t have a web presence yet.

Use social media – you will find lots of projects have a Facebook page or perhaps a group set up by ex-volunteers. Most of the projects wont be on review sites, such as Trip-advisor, but it’s always reassuring to reach out to a few ex-volunteers if possible.

Louie Arrives
Louie, a young male squirrel monkey rescued from the Black Market

There are thousands of projects out there, offering all sorts of different work as a volunteer. Research your project carefully; ensure you know what will be expected of you as a volunteer and what you will get in return. You don’t need to pay a lot of money to have an amazing and fulfilling time. Nearly all the volunteers I have met, whether they volunteered for 2 weeks or 2 months have come away with an unforgettable experience. Good luck with your search and do contact us if you would like any further help or advice.

Although this blog post was created to help you choose volunteer project in any field, but if like us you have an interest in animals you can read more about our experience at Esperanza Verde here or watch the video below.

Inca Trail Day 4

Day four was our earliest start yet, I don’t know what time it was and I don’t remember drinking my coffee. I know there must have been coffee because something got me out of my sleeping bag. It could have just been two yellow Chaskis shaking me out of it and leaning me against a tree though. But then that doesn’t explain how I got out of my pajamas. Getting to Machu Pichu as early as possible is the aim on day four. In order to achieve this we all had to be at the passport control for the moment it opened. Obviously all 500 people on the trail are doing the same thing so there were some 180 gringos in a queue, in the dark, waiting to begin.

I think I fell asleep again at some point because the next thing I knew we were off. Our final Inca trail passport stamps obtained and we were accelerating along the path. It was only a short walk that day but very crowded due to all the groups leaving at the same time.

The sign that we were almost there was a set of steps ascending almost as steeply as a wall in front of us. These were the steps to the Sun Gate, where we would finally stand and look down upon the Inca city of Machu Pichu.

IMG_1743

Obviously we weren’t disappointed. The view from the Sun Gate is spectacular and you can see the whole of the complex laid out before you.

We just had to hike another couple of kilometres and we were down in the city itself for the famous tourist photograph!

IMG_1762

Big smiles on our faces our bodies finally began to let us know exactly how upset they were with the last 4 days. At this point you have to leave Machu Pichu by the main gate so that you can officially arrive by coming in again. I was fine with this as once again we got a passport stamp, the fifth and final one!

We officially entered Machu Pichu and began to explore the city. Manny really came into his own here and gave us a great explanation of the city, individual buildings and explanations of Inca life.

IMG_1824

After this we were free to explore until we would meet up again for lunch in Aguas Calientes, the town below. Obviously we had a great time, but pictures describe it far better than I can.

IMG_1844 IMG_5509

IMG_1850 IMG_1926

After exhausting the last of our strength we took the bus down to Aguas Calientes. You can walk up or down this part, but since the path follows the road, we’d suggest the bus.

IMG_1745

When we reached the town the only things on our minds were food and a celebratory drink, or six. Pizza and Pisco were consumed in slightly excessive quantities and everyone settled back content.

We had a few hours to kill before our train left so we decided to check out the hot springs for which Aguas Calientes is named. Whilst they were hot and helped our muscles, we felt less clean than when we got in and that’s after not showering for four days. Hot yes, hygienic, no.

IMG_1929

Our final expedition was the tourist train that would take us back along the valley to Ollantaytambo, where we’d had breakfast on day one. From here the bus took us back to Cusco and dropped us in the main square at about 11pm. We struggled back to the hostel where they had thankfully already moved our bags out of storage into our room, little things like this feel so good when you’re tired.. A hot shower to rinse off the hot springs and our Inca Trail was done.


Inca Trail Day 3

Day three saw everyone getting into the routine. We were woken by coffee being wafted outside the tent, which was then again dismantled and heading up the trail before we’d even has a chance to notice. Breakfast was a delicious porridge to warm up our limbs. Manny once again motivated us with promises of awesome vistas and a bit more caffeine. Within 45 minutes the group was ready to go.

IMG_1380

The walk out of the campsite went straight up 200m to the top of the next pass. After 100m we stopped at the Tambo (resting place) on the route. These stops were part Inn, part watch tower/customs and part house on the trail. This one had spectacular views down to our last campsite and back up to dead woman’s pass.

IMG_1414

We headed on up the pass for more views.

IMG_1432

At this point in the trail Manny explained how offerings were historically made at the top of the pass. We offered some coca leaves (traditional) and some Haribo (because we could).

IMG_1455

The next part of the trail was down again, steeply to the Inca city of Sayacmarca. This is definitely one of the most impressive ruins on the trek. Similar to Machu Picchu it sits on a high ridge looking down into a valley, apart from the roofs, the buildings are excellently preserved.

IMG_1549 IMG_1482

From here we could see down to the lunch spot. Once again indicated by the distant yellow dots!

IMG_1564

Manny explained that the rest of the day would see us ascending one final pass before a very steep and long descent that would put us within sight of Aguas Calientes.

The path up to the pass was beautiful, the mountain rising above us to our right and cliffs dropping down to our left with views of the forests below.

IMG_1574

There were also some Inca tunnels, places where the trail builders decided it would be better to go through the rock than around it.

IMG_1567

And then the storm arrived. We had avoided rain on our trek so far and technically it still wasn’t raining. The hailstones were large enough to be painful and the path turned completely white with ice balls in minutes. We struggled on in to the wind with the lightning flashing all around.

At the top of the pass Manny was waiting and asked if the group wanted to wait for everyone before heading down. Very aware of the 2 metal poles strapped to my back as lightning rods I checked if I was the tallest gringo. I was relieved to see that another trekker should be struck by any lightning before I was. But not wanting to hang around, we valiantly decided it was every man for themselves on this occasion and headed off the mountain top.

IMG_1607

The descent for the rest of the day was treachorous and breathtaking. We passed through series of complex ruins along a narrow winding walkway. At places the Incas had cut tunnels in the rock and at one point around 30 stairs had been carved directly into a huge boulder. The path was difficult until the hailstones melted and then we just had to deal with the water flowing down the trail.

Towards the end of the trail we emerged into a series of Inca farming terraces, these beautifully formed marvels were the most extensive we’d yet seen and the roaming llamas meant there was some great photo opportunities.

IMG_1587

IMG_1685 IMG_1591

Here’s a photo of Lauren and I in our ponchos…

IMG_1597

The best bit of the terraces was that when we looked down them along the path we suddenly realised we could see the yellow dots! Our trusty Chaskis were only a short distance away and we could almost smell the hot chocolate from where we stood.

IMG_1649

We hurried down to the campsite and happily pulled on some warm clothes. We’d made it to the final campsite Winay Wayna.

The fourth and final day is up next…


Inca Trail Day 2

We woke early on Day 2 to a beautiful sunrise and clouds hovering just above the peaks of snow capped mountains. This vista (and the triple strength coffee) just about took the edge off being woken so early. We were expertly coaxed out of our warmish sleeping bags by our guide with the promise of a hot breakfast. No sooner was a tent vacated than the porters descended on it in a storm of efficiency that reduced it to a small bag in under a minute. We did worry that one of the group hadn’t got out in time but luckily she had escaped at the last second.

Over breakfast Manny clarified that we were indeed heading up the steep valley to the top of the pass that was level with the snow capped peaks that had just been the focus of our attention. The overall plan for the day was a 1200m ascent to 4200m then a rapid descent to 3600m. By the time Manny has explained this (3 minutes) everything except the stools we were sitting on had been packed and most of the porters were yellow spots far up the valley. Confident in our inability to match their pace we gathered our much smaller bags and set of after them.

IMG_1306

The first stop was of course to get our Inca trail day 2 passport stamps! After this we began the climb, quickly splitting into speed defined groups. Lauren and I were happy to take things slow and enjoy the views.

The climb followed a fairly consistent gradient that saw us passing through some beautiful forest before emerging above the tree line. On a couple of occasions we had to make way for llamas coming the other way. It was perfectly clear from their faces that they weren’t going to make way for us.

IMG_1297

A brief stop in a clearing for lunch after a few hours, was a welcome respite and gave people a chance to wrap up against the lowering temperatures of altitude. From here the path to the top was visible, as were the yellow pixels of our porters at the top of the pass. With the goal in site we pushed on for the summit. The views were well worth the climb with mountains behind and ruins down the valley ahead.

IMG_1308

We regrouped at the top of the pass to appreciate the views together. The rest of the day would be a short but steep descent down to the campsite, we could already see some yellow dots assembling tents! With relatively good weather overhead we all felt pretty good at being able to literally see our tents ahead.

IMG_1315

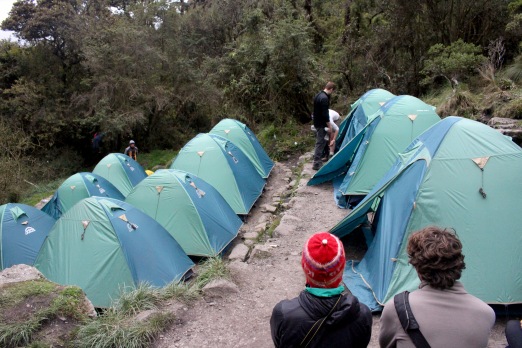
The campsite was on an Inca farming terrace, just wide enough for a tent, they are common for campsites along the Inca trail. Just wide enough for a tent, of course meant that you had to be careful getting in or out. Tripping over a rope at this point would send you through the top of a tent on the terrace below.

IMG_1349

The rest of the afternoon was free for relaxing as the next day would be the hardest and longest.

Day 3 coming soon…

Backpacking through South America…